
Imagine a thin layer of dust skimming across your tile as the vacuum hums, and you know that frustrating mess can feel endless. You can stop it by clearing small clutter first, using a hard floor setting with a soft head, and moving in slow, overlapping passes that catch grit instead of tossing it around. Then, as you work into grout lines and corners, one simple habit makes the biggest difference.
Prep Tile Floors Before Vacuuming
Before you vacuum, take a few minutes to prep the tile floor so dust doesn’t puff out and settle right back where you started. Begin with surface decluttering. Pick up toys, cords, crumbs, and larger debris that could scatter or block your path. Then clear around furniture so you can reach the full floor, especially under chairs, side tables, and other common dust hideouts.
Next, look up before you look down. If shelves, counters, or nearby ledges hold dust, wipe them first so loose particles don’t fall onto your clean tile later.
After that, work in clear sections instead of moving randomly around the room. This helps you stay organized and makes the job feel more manageable.
Finally, pay attention to corners, baseboards, and edges. Those often overlooked spots can hold the dust that affects how clean the whole room feels.
Choose a Vacuum Safe for Tile
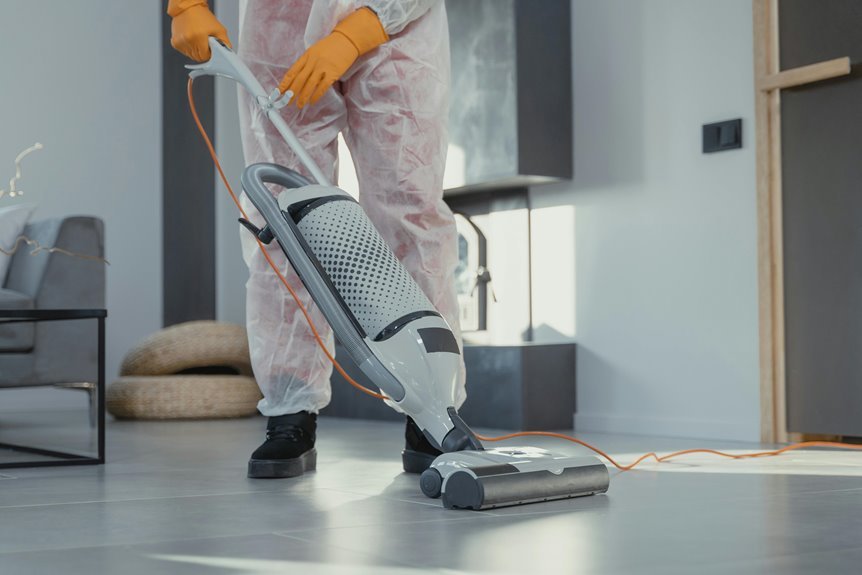
Once the floor is clear, the vacuum itself matters just as much, because the wrong setup can scratch tile, stir up dust, or leave grout packed with grit. You want a machine made for hard floor cleaning, not one that treats tile like carpet and sends debris around your home.
That is why it helps to check the vacuum’s settings before you begin. Choose a canister model, or another vacuum built for sealed surfaces and tight grout lines. Make sure you can turn off the brush roll, since spinning bristles can rough up tile and push dust aside. Then confirm the suction has a hard floor option, so you get strong pickup without creating a dusty cloud.
Finally, check that the vacuum and its attachments are compatible with your tile. When your tools match your floors, cleaning feels easier, safer, and more effective.
Use a Soft Head to Capture Dust
Because tile shows every bit of loose dust, the vacuum head you use can make the job feel either easy or frustrating. A soft brush glides gently, lifts fine grit, and improves dust capture instead of flicking debris across the room. You want the head to hug the floor, not bounce debris around. That small choice helps your home feel calmer and more cared for.
- A soft brush sweeping powder from grout with a gentle touch
- Fine dust moving into the vacuum instead of puffing into sunlight
- Smooth tile staying clean-looking, not scratched or gritty under socks
If your vacuum has a brush roll, switch it off and use the hard-floor attachment. You’ll protect tile and grout while keeping loose dust contained. That way, your cleaning feels easier, quieter, and more controlled every time.
Vacuum Tile in Slow, Overlapping Passes
Even with the right hard-floor attachment, your technique determines whether dust gets lifted or simply pushed around. Move the vacuum in slow passes so suction has time to pull fine particles off the tile instead of nudging them ahead. Keep your motion smooth and steady, and guide the vacuum head in straight lines across one small section at a time.
Build full coverage with overlapping strokes, letting each new path slightly cover the last. This simple approach helps prevent missed spots and makes cleanup feel more manageable.
If a room is especially dusty, vacuum in one direction first, then change direction for a second pass. You’ll collect more debris without turning the floor into a dusty mess.
As you work, start at the point farthest from the door and move toward it so the area you have already cleaned stays undisturbed.
Clean Grout Lines Without Spreading Debris
After you’ve covered the open tile with slow, overlapping passes, shift your attention to the grout lines, where fine dust tends to settle and hide. For grout detailing, guide the vacuum slowly along each line instead of cutting across it. That simple change helps lift dust from tiny grooves and reduces debris buildup. If your floor has texture, make a second pass from the opposite direction so you catch anything that was missed the first time.
- Trace each grout line carefully with the nozzle
- Watch dusty seams become clean, sharp, and even again
- Make sure corners and edges look finished, not overlooked
Work steadily near baseboards and high-traffic walkways, where hidden grit collects from daily use. You’re not just cleaning tile.
You’re helping the space look well maintained and feel more comfortable for everyone in your home.
Empty the Vacuum Without Releasing Dust
Once the dust is safely inside the vacuum, emptying it properly matters just as much as the cleaning itself. Take the vacuum outside when possible, or empty it over a lined trash bag to help contain fine particles. Open the bin slowly, hold it close to the bag, and let the debris fall with as little movement as possible.
Seal the bag right away for cleaner dust disposal and less mess drifting back into your home. If your vacuum uses bags, replace them before they become too full. Then check the canister rim, seals, and lid for clinging dust. Good filter maintenance also helps, because a clean filter supports airflow and keeps loosened particles from puffing back out. With a calm routine, you can keep your space feeling fresh and cared for.
Avoid Mistakes That Leave Dust Behind
Because tile shows every bit of dust, a few common vacuuming mistakes can make the floor look dirty again almost immediately. If you rush, use the wrong attachment, or skip corners, you leave grit behind and cancel out your effort. To keep your home feeling fresh and well cared for, slow down and clean in sections.
- Dust hiding deep in grout lines
- Fine grit collecting along baseboards
- Crumbs sliding out from under chairs
You will get better results when you turn off the brush roll, use smooth overlapping passes, and start at the farthest point. Good vacuum maintenance habits matter too, because clogged filters and full bins can send dust back into the room. Combine that with a regular cleaning schedule, and your tile will stay cleaner, your routine will feel easier, and your space will feel welcoming every day.
Frequently Asked Questions
How Often Should Tile Floors Be Vacuumed for Routine Dust Control?
Vacuum tile floors two to three times a week for routine dust control. In busy homes, vacuum more often to prevent dust buildup and keep the space clean and welcoming.
Is Mopping After Vacuuming Necessary for Tile Floors?
Yes, you should mop after vacuuming tile floors whenever you want to remove surface residue and complete the cleaning process properly. This helps keep your space fresh, well maintained, and clean.
Can Vacuuming Help Reduce Allergens on Tile Floors?
Yes, you can reduce allergens with regular tile vacuuming. You will improve allergen control and indoor air quality when you vacuum slowly, clean grout lines and corners, and maintain your filters, helping everyone in your home breathe easier.
What Type of Tile Needs Extra Care When Vacuuming?
Natural stone and textured tile need extra care because they scratch easily and trap dust in grooves. To protect these floors, use soft brushes, gentle suction, and slow, overlapping passes.
When Should Vacuum Filters Be Replaced for Best Performance?
Replace your filters when suction drops, odors linger, or the manufacturer’s recommended interval indicates it is time. If a frequently used family vacuum clogs every month, replace the filter more often. This helps maintain strong performance and keeps your home smelling fresh.
