
You want cleaner air, better airflow, and less dust floating around your home, and you can get all three by cleaning air vents with a vacuum cleaner the right way. First, turn off your HVAC system, gather a hose, brush attachment, cloth, and dust mask, then remove each vent cover carefully and vacuum the cover, trim, and vent opening without pushing debris deeper inside. However, a few small mistakes can undo your effort, especially with ceiling and floor vents.
What You Need to Clean Air Vents
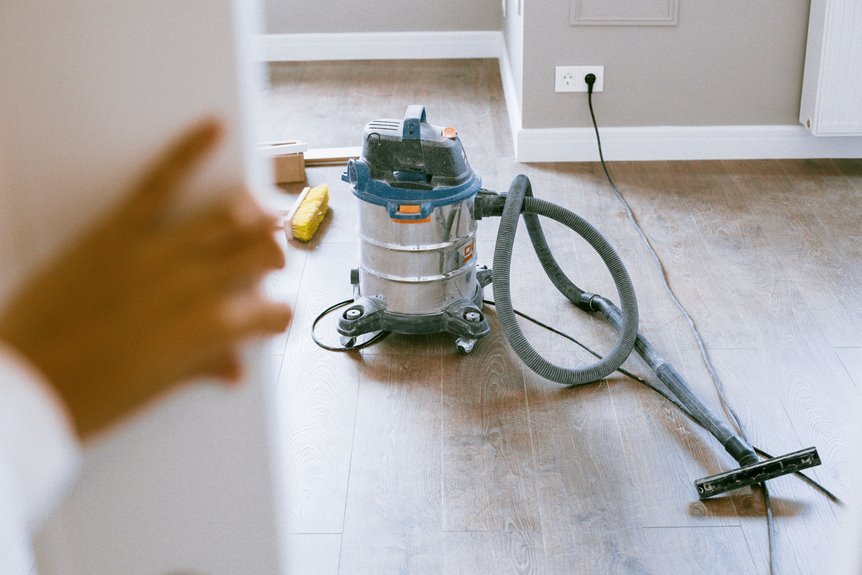
Before you start, gather the right tools so the job feels simple instead of messy. Having everything within reach helps the process go more smoothly. Start with vacuum tools, including a hose extension, a brush attachment, and a narrow nozzle for tight vent spaces. Next, bring cleaning supplies such as microfiber cloths, a soft brush, warm soapy water, gloves, and a dust mask.
If the vent looks especially dusty, place a drop cloth underneath to catch debris and keep the area organized.
Then inspect the vent opening closely so you understand what kind of buildup you’re dealing with before you begin. With this preparation, the cleaning process becomes easier and more effective.
Turn Off Your HVAC System
Before you start cleaning, turn off your thermostat so the system doesn’t blow dust through your home.
If possible, shut off the electrical supply as well for added safety while you work around the vents.
This simple step helps protect you, keeps loose debris from spreading, and makes the cleaning process easier.
Power Down Thermostat
Once you’re ready to clean, turn off your HVAC system at the thermostat so dust doesn’t blow through the house while you work. This simple step helps everyone in your home breathe easier and keeps the mess from spreading from room to room.
Check your thermostat settings carefully, and switch the system to off before you remove any vent covers.
That pause in airflow gives you a cleaner, calmer space to work in. It also helps your vacuum collect debris more effectively, without moving air interfering with the job.
Think of it as a smart power shutdown that puts you in control before the real cleaning starts. If your system was running, wait a minute for the airflow to stop completely. Then you can move forward with confidence, knowing you have set up the job the right way.
Cut Electrical Supply
Now that the airflow has stopped at the thermostat, take one more safety step and cut power to the HVAC system, if your setup allows it. This helps you clean with greater confidence and supports proper electrical safety.
- Go to your breaker panel and look for the switch labeled furnace, air handler, or HVAC.
- Flip that breaker fully to the off position so the unit can’t start while you’re working.
- If your system has a nearby service switch, turn that off as well for added peace of mind.
- If the labels are unclear, pause and check your manual so you can proceed with confidence.
This small step keeps your cleaning routine calm and controlled.
It creates a safer environment for you and everyone at home, which reflects careful home maintenance.
Prevent Dust Circulation
Although the vent may look harmless, your HVAC system can pull loose dust through the ducts as soon as it starts. Turn it off at the thermostat before you begin cleaning. This simple step helps keep your space calmer, cleaner, and easier to manage while you work.
Once the system is off, air won’t push dust back into the rooms your family uses every day. It also makes dust containment methods more effective, especially after you vacuum around the register and inside the opening. If you notice musty buildup, shutting the system down also improves mold spore control by reducing airflow that can spread particles.
Before you continue, wait for the fan to stop completely. Then you can clean with more confidence, less mess, and a stronger sense that you’re taking good care of your home.
Remove Vent Covers Safely
Before removing any vent cover, turn off your HVAC system so dust doesn’t blow back into the room.
Unscrew the cover carefully, keeping one hand on it to prevent it from dropping or scraping the wall, floor, or ceiling.
Lift it away gently to avoid bending the grille or damaging the clips.
Turn Off HVAC
Since dust can spread quickly once air starts moving, turn off your HVAC system at the thermostat before touching any vent cover. This quick shutdown helps keep loose debris from blowing through your home and supports safer airflow conditions while you work.
Before you begin, make sure the area is clear and easy to access:
- Switch the thermostat to Off, not Auto, so the fan doesn’t turn on.
- Wait a minute for airflow to stop completely at the vent.
- Move nearby furniture, rugs, or decor so you can reach the cover comfortably.
- Place a drop cloth under the vent in case dust falls, which will make cleanup easier.
This brief step helps protect your space and makes the cleaning process more manageable from the start.
Unscrew Covers Carefully
Once the airflow has stopped and the area is clear, remove the vent cover with a calm, careful hand. Start by identifying the screw type so you can choose the right screwdriver and avoid stripping the head. This small step helps you feel prepared and keeps the job moving smoothly.
Next, support the cover with one hand while loosening each screw with the other. Use steady pressure and turn slowly for careful screw removal, especially if paint or dust makes the screws stick. If a screw resists, pause, reset your grip, and try again instead of forcing it.
Place each screw in a small bowl or cup so nothing rolls away. As you work, you create a cleaner space with the same steady care that helps every home feel welcoming and well loved.
Handle Covers Gently
Although the cover may look sturdy, handle it gently as you remove it so you don’t bend the metal, crack painted edges, or release dust into the room. That brief pause helps you stay in control and keeps the area looking well cared for.
- Support one side with your hand before lifting.
- Keep the cover level so trapped dust doesn’t spill.
- Place screws in a bowl so they don’t get lost.
- Set the cover on a towel to protect the vent finish.
Gentle handling is especially important with older registers or painted trim.
If the cover sticks, wiggle it lightly instead of pulling hard. The goal is a clean vent, not an unnecessary repair. By working slowly, you protect the cover, the wall, and the clean, orderly feel of your space.
Vacuum Dust From Vent Covers
Before you reach into the duct, start by vacuuming the vent cover itself, because that’s where loose dust often collects and falls back into the room.
Use your vacuum’s brush attachment to remove surface dust, and move slowly across the slats. That steady pace helps lift debris instead of pushing it around. For gentle grille vacuuming, keep the brush flat against the cover and use light pressure, especially if the finish looks delicate.
You aren’t scrubbing. You’re easing dust away so the cover stays in good condition.
Next, vacuum the front edges, corners, and face of the cover, where buildup tends to hide.
If you have already removed the cover, support it with one hand while you vacuum with the other. That simple step helps you clean with confidence and keeps your space feeling cared for.
Vacuum Inside the Vent Opening
Now you can vacuum inside the vent opening, where dust often collects just beyond the cover. Start by using the brush attachment to clean around the vent edges, then guide the hose slightly deeper to remove loose debris.
Move slowly and avoid forcing the hose, so you can clean thoroughly without causing damage.
Use Brush Attachment
Fit the brush attachment onto your vacuum hose, then guide it gently into the vent opening after removing the cover. This step gives you better control while cleaning and helps loosen dust from the inner edges without scratching metal or paint.
- Angle the brush head toward the vent sides for better contact.
- Use a steady brushing motion as you move slowly.
- Let the bristles loosen dust while the suction removes it.
- Keep your wrist relaxed so you don’t press too hard.
Focus on the visible surfaces just inside the opening as you continue. This helps you remove loose buildup neatly and safely.
Reach Deep Dust
Once the brush has cleared the dust near the edges, guide the vacuum hose a little deeper into the vent opening to remove debris just beyond reach. Move slowly, and ease the hose in and out so it collects loose dust instead of pushing it farther into the duct.
If your vacuum has a narrow hose extension, use it to follow the duct’s path without scraping the sides. This improves deep duct reach and helps keep the tool steady and safe. There’s no need to force it. Gentle passes work better and give you more control.
As you clean, rotate the hose slightly to pick up dust clinging to corners and seams. With each careful pass, you help make your space feel fresher, cleaner, and more welcoming.
Clean Vent Edges
With the deeper dust loosened, bring your focus back to the vent edges, where grime often clings to the lip of the opening and the inner frame. This is where your vacuum does precise work, helping your space feel fresh and cared for.
- Run the brush attachment slowly around the rim for steady, thorough cleanup.
- Angle the hose into corners, where dust hides and edge detailing matters most.
- Use short passes along the inner frame, so you lift debris without scraping surfaces.
- Follow with a microfiber cloth to catch what the vacuum loosens but doesn’t grab.
As you work, keep your hand light and your pace calm. You aren’t just cleaning a vent. You’re caring for the home you belong in, one neat edge at a time, with confidence and ease today.
Use a Brush for Stuck Debris
Whenever dust clings to the vent instead of lifting right away, use a soft vent brush or the vacuum’s brush attachment to loosen it before vacuuming again. Work with gentle, short strokes so you loosen stuck buildup without scratching the metal or pushing debris farther inside. As you brush, keep the hose close to catch falling dust right away.
If you notice thicker grime, angle the bristles into corners, slats, and seams where buildup tends to hide. Use light pressure to scrub stubborn residue, then pass the vacuum over the area again to lift what you loosened. Move patiently and stay consistent, because a careful touch gets better results than force. This step helps you clean thoroughly, and your vent will already look fresher and feel well cared for.
Wipe the Vent Cover and Trim
After you loosen and vacuum the dust, wipe the vent cover and the trim around it so the area looks fully clean, not just slightly improved. This step gives the space a cared-for finish that people notice. Use a damp microfiber cloth and gentle pressure to lift grime without smearing it.
- Fold the cloth so you always have a clean side ready for detail work.
- Wipe the front, edges, and back of the cover if you removed it.
- Follow with a careful wipe down of the trim to catch dust in the corners.
- Dry the area with a fresh cloth so the finish looks polished and streak-free.
As you clean, you’re doing more than freshening a vent. You’re helping create a home that feels welcoming, orderly, and well cared for every day.
Adjust for Floor, Wall, and Ceiling Vents
Because each vent sits in a different location, you will get better results when you adjust your vacuuming method to match the vent type. For floor vents, kneel nearby, remove the cover, and guide the hose straight down so dust lifts instead of spreading. For wall vents, support the hose with one hand and vacuum from top to bottom.
| Vent type | Best adjustment |
|---|---|
| Floor | Use direct floor vent access |
| Wall | Steady the hose and work downward |
| Ceiling | Use safe, short upward strokes |
For overhead openings, safety matters most when cleaning ceiling vents. Use a stable step stool, keep your balance centered, and hold the hose lightly so you remain in control. Then move the brush attachment in short passes around the opening before reaching inside. This approach helps you clean with confidence and maintain better control throughout the process.
Avoid Common Air Vent Cleaning Mistakes
While vacuuming air vents may seem simple, a few common mistakes can spread more dust, damage the vent, or leave buildup behind. To keep your home feeling fresh and well cared for, take your time and clean with purpose. Small habits make a noticeable difference, and learning the right routine gets easier with practice.
- Don’t leave the HVAC system running, because dust can blow back into the room.
- Don’t push the hose too far inside, because this can damage duct surfaces.
- Don’t skip the vent cover, because trapped grime can restrict airflow.
- Don’t forget to check the filter and inspect airflow after cleaning.
Use a brush attachment instead of a hard plastic edge, which can scratch the grille.
If you rush, you’re more likely to miss corners and nearby dust. A steady approach helps keep your space cleaner, calmer, and more welcoming each day.
Know When to Call a Pro
Even with careful vacuuming, some vent problems need more than a brush attachment and a little patience. If you see thick buildup just past the opening, smell musty air, or notice weak airflow after cleaning, trust that instinct. Your home should feel safe, and it’s okay to ask for help.
That matters even more if you spot stains, moisture, loose duct parts, or hear rattling inside the system. These signs can point to hidden damage that a vacuum can’t fix.
In those cases, a professional duct inspection can provide clear answers and help protect your household. Also, take persistent mold warnings seriously. If mold keeps coming back or spreads beyond the vent cover, call an HVAC professional.
You’ll feel more confident knowing your system is being handled properly and with care.
Keep Air Vents Cleaner Longer
After you finish cleaning, a few simple habits can help your air vents stay cleaner for much longer. As you build small routines, your whole home feels fresher, and you stay ahead of buildup with less effort. That’s where dust prevention and a consistent cleaning schedule make a real difference.
- Change HVAC filters on time, because clogged filters send more dust toward your vents.
- Vacuum floors, rugs, and pet areas often, so loose debris doesn’t keep circulating through your system.
- Wipe vent covers and nearby walls weekly with a microfiber cloth to catch dust early.
- Keep furniture, curtains, and clutter away from vents, so airflow stays strong and dust settles less.
As you maintain these habits, vent care becomes part of your regular home routine, not another chore you have to manage on your own.
Frequently Asked Questions
How Often Should Air Vents Be Cleaned in a Typical Home?
In a typical home, clean air vents every three to six months. For best results, inspect, vacuum, and wipe them down during seasonal maintenance. If you have pets or allergies, you may need to clean them more often.
Can Dirty Air Vents Increase Energy Bills?
Yes, dirty air vents can increase your energy bills because they restrict airflow and make your HVAC system work harder. Keeping vents clean helps reduce energy waste and supports more efficient performance throughout your home.
Are Reusable Air Filters Better for Reducing Vent Dust?
Yes, reusable air filters can help reduce vent dust if you maintain them consistently and keep airflow efficient. They can save money, but your HVAC system performs best when you clean the filters regularly and follow a routine you can maintain.
Why Do Air Vents Get Dusty so Quickly After Cleaning?
Like Sisyphus, you may notice vents collecting dust again soon after cleaning because common causes of buildup include leaky ducts, dirty filters, busy rooms, and strong airflow patterns that cleaning alone cannot fully address. You are not alone; regular upkeep helps keep it manageable.
Can Pet Hair Inside Vents Affect HVAC Performance?
Yes, pet hair buildup inside vents can reduce HVAC performance by blocking airflow, trapping dust, and forcing the system to work harder. Keeping vents clean and clear helps maintain comfort throughout your home.
