
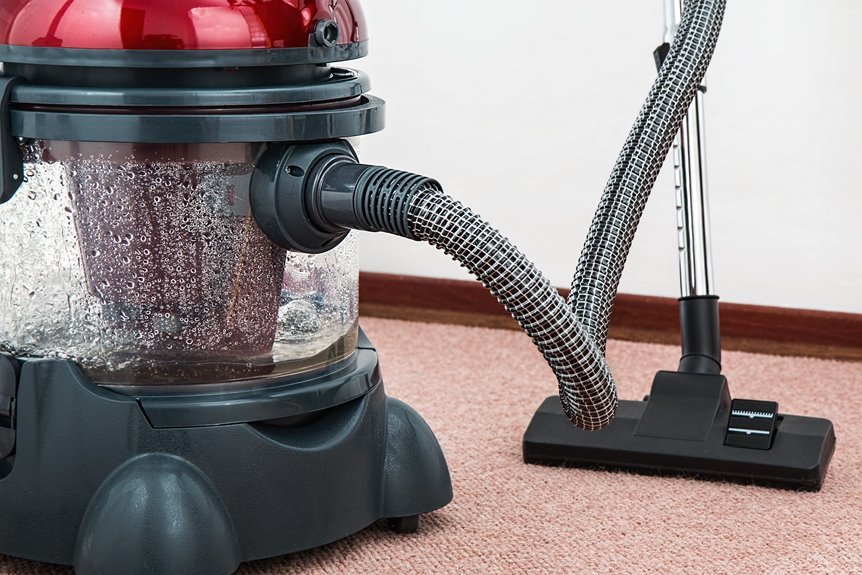
If your vacuum suddenly smells dusty and loses suction after one busy weekend, the filter is often the cause. Before doing anything else, check the manual to confirm whether the filter is washable, then unplug the vacuum and remove the filter carefully. Next, tap out loose dirt or rinse it with cool water if it is washable, and let it dry completely before reinstalling it. That final step matters more than most people realize, and it can help prevent more serious problems.
Check if Your Vacuum Filter Is Washable
How do you know whether your vacuum filter can handle water? Start by checking the owner’s manual and the filter itself. You aren’t guessing, you’re confirming that your vacuum can remain part of your clean, comfortable home routine. Look for washable indicators such as rinse icons, care labels, or wording like washable, reusable, or water safe.
Next, compare the filter with common filter types. Foam and felt filters are often washable. Cartridge and HEPA filters can vary, so the manual matters. Paper filters usually can’t handle water at all. Robot vacuum filters often need dry cleaning instead.
If you don’t see clear washable indicators, treat the filter as non washable. That careful decision helps protect the filter, the motor, and the consistent cleaning performance your home depends on each day.
Gather Your Cleaning Supplies
Once you’ve confirmed whether the filter is washable, gather the right supplies before removing anything. This small step helps you stay prepared and keeps the process simple and clean.
| Item | Why you need it | Best for |
|---|---|---|
| Soft brush | Gently lifts loose dust | Pleated filters |
| Microfiber cloth | Wipes away surface debris | Non-washable filters |
| Mild dish soap | Cleans safely when approved | Foam filters |
| Cold or lukewarm water | Rinses without damaging the filter | Washable filters |
| Gloves and towel | Keep hands clean and catch mess | Any setup |
Keep your owner’s manual nearby as well. It is one of the most useful tools for proper filter care.
Remove the Filter Safely
Before you remove the filter, switch off and unplug the vacuum so you can work safely and avoid a dusty mess.
Next, locate the release latch or filter cover, then open it slowly so you don’t force any parts.
Once you reach the filter, lift it out gently to keep dust contained and prevent damage.
Power Off First
Even if you’re in a hurry, begin by turning the vacuum off and unplugging it before removing the filter. That brief pause helps protect you, your machine, and your home. Think of it as a safety step before removal, not a delay. When working with an unplugged appliance, precautions still matter because hidden power can strain parts and catch you off guard.
Next, let the vacuum settle for a moment, then empty the dust bin or canister if needed. This helps prevent loose dirt from spilling while you access the filter area. Keep the vacuum steady, move slowly, and make sure your hands are dry for a better grip. If a part feels stuck, don’t force it.
You’re maintaining your vacuum the right way, just as anyone would who wants it to last.
Locate Release Latch
The next step is to locate the release latch or cover that secures the filter in place, because this small part determines how safely the filter can be removed. After powering off the vacuum, check near the dust bin, side panel, or top housing. Look for latch markings, arrows, or a small tab that indicates how to open the compartment safely.
| Spot | What to look for | Why it helps |
|---|---|---|
| Dust bin edge | Clip or tab | Opens filter area |
| Side panel | Arrow or lock icon | Shows where to press or pull |
| Top cover | Push button | Lifts access cover |
Work carefully and avoid forcing any part. If you do not immediately find the latch points, consult the manual to confirm the correct access location. This helps you proceed safely and prevents damage.
Handle Filter Gently
Once you’ve opened the filter compartment, remove the filter slowly and keep a light grip so you don’t crush, tear, or bend it. That small pause helps you stay in control and protects the parts your vacuum depends on.
If the filter feels stuck, don’t yank it. Wiggle it free with steady fingers and check how it sits before lifting it out.
Next, handle the filter gently so dust stays contained and the frame keeps its shape. Hold the edges whenever possible, especially with paper, HEPA, or pleated styles.
As you lift it out, inspect it carefully for tears, damp spots, bent pleats, or loose seals. This isn’t excessive caution. It’s proper care that helps protect your vacuum and keeps cleanup easier for everyone at home.
Wash or Tap Out the Filter Properly
Before you clean anything, confirm whether your filter is washable, because water can quickly damage the wrong type. Check your manual first, then follow the correct method.
For non-washable filters, begin with careful dust removal. Tap the filter lightly over a bin or sink, and use a soft brush on the pleats to loosen trapped dirt without causing damage.
If your filter is washable, rinse it under cold or lukewarm water. For foam filters, use a small amount of mild soap only if the manual permits it. Gently squeeze or swish the filter to help remove dirt. Continue rinsing until the water runs clear.
These basic filter maintenance steps help you care for your vacuum properly and consistently.
Let the Filter Dry Completely
Even if the filter looks clean after rinsing, do not rush the drying step. Trapped moisture can cause musty odors, reduced suction, and possible motor issues if you reinstall it too soon. Place the filter in a well-ventilated area and allow 12 to 24 hours for drying, or longer if it still feels cool or damp.
| Check | What to do | Why it matters |
|---|---|---|
| Surface | Pat lightly with a towel | Removes excess water |
| Airflow placement | Place near open air | Supports natural drying |
| Proper drying | Wait until fully dry | Protects suction and internal parts |
Caring for your vacuum also helps preserve the routine that keeps your home in order. Avoid using hair dryers, heaters, or direct sunlight. Heat can warp the filter, which can create problems later.
Reinstall the Filter the Right Way
Now that your filter is fully dry, align it with the slot or housing so it sits as the vacuum manufacturer intended.
Press it into place gently but firmly, and make sure it feels secure, not loose or tilted.
Before closing everything up, check that the filter fits flush so your vacuum can maintain strong, steady suction.
Check Filter Alignment
One last check can save you a lot of trouble: make sure the filter sits in the same position it had when you removed it. As you place it back, look for alignment marks, tabs, grooves, or arrows that show the correct direction. Those small details help your vacuum perform the way your household relies on every day.
Next, press the filter in gently and watch how it settles. You want clean lines, even edges, and no tilting. If one side sits higher, lift it out and try again instead of forcing it.
A quick fit confirmation matters because a crooked filter can restrict airflow and put extra strain on the machine. Trust your eyes and your hands. When everything looks centered and properly seated, you can be confident the filter is aligned correctly.
Secure Filter Placement
Set it back in place with a light, steady hand, because a securely seated filter helps your vacuum maintain proper airflow. Guide the dry filter into the filter housing without forcing it. If it catches, pull it back, realign it, and try again so the edges remain even and supported.
Next, press only at the contact points identified in the manual. This helps prevent the frame from bending and ensures each section sits correctly. Listen and feel for proper fastening, whether that means a soft click, a twist, or a latch that closes smoothly.
You aren’t simply returning a part to its place. You’re restoring the system that allows your vacuum to operate effectively. Keep your touch gentle but confident. A careful reinstall protects airflow, supports the motor, and gives the machine the stable setup it needs.
Test Proper Fit
Once the filter is back in place, check that it sits flat and even inside the housing, because even a slight tilt or gap can weaken suction right away. Press along the edges with clean fingers, and make sure the frame doesn’t rock, twist, or lift. This simple fit check helps restore proper vacuum performance.
Next, close the compartment and listen for the latch or cover to click into position.
Then turn the vacuum on for a quick test. If you hear a whistle, feel air leaking, or notice weak pickup, remove the filter and reseat it.
This seal check is important. When the filter fits snugly, it protects airflow, supports the motor, and helps keep cleaning performance consistent.
How Often Should You Clean a Vacuum Filter?
Usually, you should clean your vacuum filter every 1 to 3 months, but the ideal schedule depends on how often you vacuum, the type of filter your machine uses, and how much dust, pet hair, or fine debris your home collects. If you vacuum daily, inspect the filter once a month. If you vacuum less often, cleaning it every two or three months may be enough.
To determine the best maintenance schedule, pay attention to the signs your vacuum gives you. Weak suction, musty odors, increased noise, or visible dust on the filter usually mean it needs attention. Homes with pets, children, allergies, or heavy foot traffic often require more frequent filter care.
Washable foam filters typically need regular rinsing, while paper filters and some HEPA filters may require gentler cleaning or replacement based on the manufacturer’s guidelines. Checking your manual will help you maintain the correct schedule.
Frequently Asked Questions
Can a Dirty Filter Make My Vacuum Smell Bad?
Yes, a dirty filter can make your vacuum smell bad. Trapped dust, hair, and damp debris create unpleasant odors. As airflow drops, those smells can worsen, and your vacuum may blow musty air back into the room.
Why Does My Vacuum Lose Suction After Filter Cleaning?
Your vacuum loses suction after filter cleaning because drying problems or airflow blockages can restrict performance. You’ll get better results by reinstalling only fully dry filters, removing debris carefully, and replacing any damaged filter.
Should I Wear a Mask When Cleaning Dusty Vacuum Filters?
Yes, you should wear a mask whenever you clean dusty vacuum filters, especially if you’re sensitive to dust exposure. A mask helps protect your lungs, supports respiratory protection, and makes your cleaning routine safer, smarter, and easier.
Can Cleaning the Filter Help Reduce Vacuum Overheating?
Yes. Even though overheating seems motor related, cleaning the filter can help because it restores airflow for cooling and improves motor protection. It helps maintain strong suction, reduces strain, and allows your vacuum to run as it should.
When Should I Replace a Vacuum Filter Instead of Cleaning It?
Replace your vacuum filter if you notice tears, holes, warping, lingering odors, or weak suction even after cleaning. Following the replacement schedule in your manual helps extend filter life and keeps your cleaning routine effective.
