
If your robot vacuum starts bumping into chair legs, missing edges, or drifting past its dock, the sensors probably need a quick cleaning. Before you begin, turn the unit off and gather a dry microfiber cloth, cotton swabs, and a small amount of compressed air. Then locate the cliff sensors, bumper sensors, camera, or LiDAR on your model. Wipe each sensor gently, avoid liquids and abrasive pads, and test the vacuum afterward. A few careful steps can restore accurate navigation.
Signs Your Sensors Need Cleaning
If your robot vacuum starts acting a little confused, the sensors may simply need a good cleaning. You may notice odd zigzags, sudden stops, tight circles, or bumps into walls it usually avoids. These are often early signs of false navigation cues, especially when dust clouds the sensor windows.
It is also important to watch for changes in routine. If your vacuum hesitates near stairs, avoids open floor areas it once cleaned well, or repeatedly misses the dock, its sensors may be struggling to read your home correctly. You may also hear more bumper taps, see missed rooms, or find it trapped under furniture it once escaped easily. When several of these small changes appear together, you aren’t alone. Many households deal with this issue, and a careful sensor check often gets the vacuum back on track.
Get Safe Tools for Cleaning
Before you touch any sensor, gather safe tools that clean effectively without leaving scratches or moisture behind.
Use a soft microfiber cloth, dry cotton swabs, compressed air, and a small soft brush to clean each sensor area gently.
If your manual permits a cleaner, apply it to the cloth instead of the robot, because this helps prevent damage.
Essential Cleaning Supplies
Since the right tools make sensor care safer and much easier, start with a soft microfiber cloth for the main sensor windows, a dry cotton swab for tight corners, a small soft brush for loose dust, and compressed air used in short bursts for narrow gaps around the bumper and wheel areas.
These basics help you clean with confidence and make your robot easier to maintain as part of the family routine.
If a smudge doesn’t lift, use only a manufacturer approved cleaner, and apply it to the microfiber cloth, never directly onto the vacuum. This simple habit protects delicate parts and helps prevent streaks or trapped moisture.
As you gather supplies, keep everything clean, dry, and within reach, so the job feels calm instead of fussy. With the right kit beside you, maintenance feels manageable and reliable every time.
Sensor-Safe Handling Tools
A few simple handling tools make sensor cleaning safer, gentler, and far less stressful. Start with microfiber cloth handling, because a soft, lint free cloth lifts dust without scratching delicate sensor windows. Keep one cloth just for your robot so it stays clean and ready whenever maintenance day comes around.
Next, rely on cotton swab precision for tight corners, recessed sensor openings, and bumper edges. Use dry swabs first, then rotate to a fresh tip as dust builds. A small, soft brush helps loosen crumbs near wheels and side sensors, while short bursts of compressed air clear narrow gaps.
Set everything beside your robot before you begin. That small routine helps you feel prepared, confident, and consistent about keeping your vacuum running smoothly with care.
Turn Off the Robot Vacuum
Before touching any sensor, turn off the robot vacuum so it can’t start moving while you clean it.
Next, unplug the charging base or disconnect the vacuum from power, if your model allows it, for added safety.
Then confirm that the lights are off and the unit is fully shut down, so you can clean it safely and protect both yourself and the vacuum.
Power Down Safely
Before cleaning the sensors, turn the robot vacuum off completely so it can’t start moving while you handle it. This simple step helps you stay in control and protects your hands during cleaning. If your model has a physical switch, use it. If it shuts down through the app, wait until all lights turn off.
Next, make sure the battery is isolated and the power cord is safely out of the way. The vacuum should be fully inactive before you touch any sensor area. Keep your fingers away from buttons that could turn it back on by accident.
Then place the robot on a clean, flat, soft surface so your cleaning process starts from a safe position. If the dust bin blocks access, remove it now. Check your manual to confirm the correct shutdown steps for your model.
Unplug Charging Base
Unplug the charging base, even if the robot is already switched off, so no power flows through the dock while you clean nearby sensor areas. This step disconnects power before your hands move around contacts, bumper edges, or front openings. It also isolates the charging dock components, so you can work calmly and confidently.
- Pull the plug from the wall, not the cord, to avoid wear.
- Move the dock slightly away from your cleaning area for better access.
- Keep the cord tucked aside so the robot and your tools stay clear.
- If your model allows it, disconnect any additional power source options from the unit as well.
Confirm Complete Shutdown
Now that the charging base is unplugged, turn the robot vacuum fully off so it can’t wake up while you clean the sensors. Press and hold the power button until the lights go dark and any startup sounds stop. If your model has a switch underneath, flip it to Off as well. This improves battery isolation and keeps moving parts still while you work.
Next, place the robot on a clean, soft, flat surface to protect it. Remove the dust bin if it blocks access, and check your manual if the power controls vary by model. Confirm that the unit is fully shut down by checking for no lights, no voice prompts, and no wheel movement when you tap the bumper.
This quick check helps ensure you’re ready to continue with routine care.
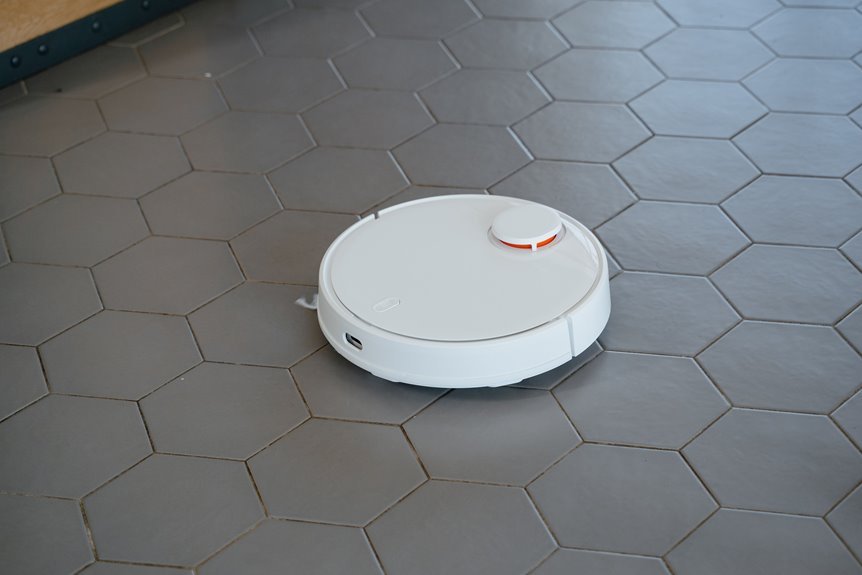
Find the Sensors on Your Vacuum
Before you clean anything, take a minute to locate each sensor on your robot vacuum so you don’t miss the areas that matter most. Check your manual first, because it usually includes a sensor map and can help you identify any less visible sensor types your model uses. This gives you a clear starting point and makes the inspection process easier.
- Look underneath for cliff sensors near the outer edges.
- Check the front bumper for anti-collision or bumper sensors.
- Locate the top LiDAR dome or front camera lens for navigation.
- Inspect the side panels and wheel areas for additional guidance sensors.
Next, place your vacuum on a soft, flat surface and remove the dust bin for a clearer view.
As you identify each part, you create a simple maintenance routine that helps keep your robot operating reliably.
Wipe Sensors Safely and Gently
Start with the gentlest touch possible, because robot vacuum sensors are small, sensitive, and easy to scratch if you rush. Use a clean microfiber cloth, and guide it with light pressure and gentle motions. This simple habit helps you feel confident while you clean.
| Do this | Why it helps |
|---|---|
| Fold the cloth | You control each pass |
| Wipe in small circles | Smudges lift without stress |
| Use short strokes | Dust comes off cleanly |
| Try a dry swab in corners | Tight spots stay protected |
| Stop if grit appears | You avoid scratches |
As you improve your sensor wiping technique, stay calm and steady. You are caring for your vacuum with the kind of attention that builds skill and confidence. If residue remains, check the manual before using a lightly damp cloth.
Clean Cliff and Bumper Sensors
First, turn your robot over and locate the cliff sensors along the underside edges and the bumper sensors around the front.
Next, gently wipe each sensor window with a dry microfiber cloth or a dry cotton swab so you don’t leave streaks or scratches.
Then, clean along the bumper edges and small front gaps with careful wipes or short bursts of compressed air to remove dust that can affect guidance.
Locate Cliff Sensors
Should you flip the robot vacuum over on a soft, flat surface, you’ll usually find the cliff sensors on the underside near the outer edges. This common sensor placement helps your robot detect stairs and ledges before trouble starts. You aren’t alone if they seem hard to spot at first. Most brands place them in similar locations along the underside edges, so once you know the pattern, it becomes easier to identify them.
- Look near each front corner on the bottom panel.
- Check for small dark windows close to the rim.
- Compare both sides, since sensors often appear in matching pairs.
- Use your user manual if the shapes blend into the housing.
Next, check the front bumper area as well, since nearby sensors can collect dust and affect how confidently your robot moves through your space.
Wipe Sensor Windows
Now that you’ve found the cliff sensors underneath, clean the sensor windows gently with a dry microfiber cloth. Support the robot on a soft, clean surface, then wipe each window in small circles. Don’t scrub. Lift away dust and skin oils that can interfere with readings.
Next, clean the front sensor windows near the bumper using the same light pressure. If grime has collected in a tight corner, use a dry cotton swab and roll it gently along the edge. This type of lens maintenance can help restore reliable performance. To prevent streaks, switch to a clean section of the cloth as you work. Keep everything dry to protect the finish and improve sensor accuracy.
Clean Bumper Edges
Why do bumper edges matter so much? They guide how your robot senses walls, furniture, and drops, so a dirty edge can make it seem clumsy. Before you start, power it off and place it on a soft surface.
Then focus on the front bumper and underside edge, where bumper gap dust and front edge debris collect.
- Run a dry cotton swab along the bumper seam to lift concealed dust.
- Use short bursts of compressed air to clear tight gaps without forcing dirt inward.
- Wipe nearby cliff sensor edges with a soft microfiber cloth.
- Check that the bumper moves freely and springs back evenly.
As you clean, stay gentle. You’re helping your robot move more confidently through your space, instead of bumping into every chair.
Clean Charging Sensors for Docking
Because docking problems often begin with dirty charging sensors, clean these contact points during the same maintenance session. Power off your robot, unplug the dock, and place both on a clean, soft surface. Then wipe the metal contacts on the robot and dock with a dry microfiber cloth. For tight spots, use a dry cotton swab.
Next, check the charging contacts for dust, hair, or dull buildup that can prevent a solid connection. If your manual allows it, lightly dampen the cloth rather than applying liquid directly.
As you finish, follow a few simple dock alignment tips. Keep the dock flat against the wall, clear nearby clutter, and center the robot while testing. You aren’t just cleaning parts, you’re helping your vacuum return to the dock reliably.
Avoid Damaging Sensor Surfaces
While you clean each sensor, use the lightest touch possible so you don’t replace dirt with damage. Sensor windows scratch easily, and even small marks can affect how your robot reads floors, walls, and stairs. That’s why scratch-free cleaning matters. You aren’t just wiping plastic. You’re protecting an important part of your home team.
To make that care simple, focus on gentle surface care every time:
- Use a soft microfiber cloth, not paper towels or rough fabrics.
- Wipe in small, slow passes instead of scrubbing hard.
- Keep liquids off sensor faces unless your manual allows them.
- Use dry cotton swabs for tight edges and recessed spots.
If debris doesn’t lift right away, pause and switch tools. A patient touch helps keep your robot ready for daily use.
Test the Vacuum After Cleaning
Once everything is clean and fully dry, run a short test cycle to confirm the sensors are reading the room correctly. Start in an open area, then let the robot move toward walls, table legs, rugs, and its dock. Look for smoother turns, fewer taps, and steady path choices that feel normal again.
If your model supports post-cleaning calibration, follow the manual either before or immediately after that short test cycle. This extra step can help the vacuum reorient more accurately. Stay nearby as it moves, and watch for hesitation, spinning, missed edges, or docking trouble. These signs suggest the sensors may still need attention. If the vacuum moves through the room correctly, you can be confident your cleaning was effective and your routine is back on track.
Know Why Sensors Get Dirty
Even though your robot vacuum looks clean on the outside, its sensors can still collect a thin layer of dust that gradually affects how it reads your floors.
With regular use, fine debris settles on sensor windows and reduces their accuracy.
This happens for a few simple reasons:
- Dust buildup clings to static-charged plastic parts and cloudy sensor covers.
- Pet hair can sweep across openings and interfere with signals.
- Floor grit, lint, and crumbs can bounce upward during cleaning cycles.
- Smudges from handling or bin removal can leave behind a light film.
Because your robot works close to the ground, it’s exposed to the same mess your home collects.
You aren’t doing anything wrong.
This is a normal part of living in a busy home where your vacuum works hard every day.
Keep Sensors Clean Longer
Usually, a few simple habits will keep your robot vacuum’s sensors cleaner for longer and save you from repeat cleaning sessions. Start by emptying the dust bin often and checking the brushes and wheels each week, because loose hair and grit spread quickly. These sensor maintenance habits help your vacuum move smoothly and stay reliable at home.
Next, keep floors picked up before each run. Small crumbs, pet fur, and strings can work their way into sensor openings and bumper gaps. Use these debris prevention tips as well: wipe sensor windows monthly, clean the wheel wells, and place the dock in a low dust area.
If your home gets especially busy, run a quick test cycle after major cleaning days to catch smudges early. With steady care, you’ll spend less time fixing navigation issues and more time enjoying a home that feels organized.
Frequently Asked Questions
How Often Should Robot Vacuum Sensors Be Professionally Inspected?
Schedule professional sensor inspections once a year, or sooner if you notice navigation errors after routine cleaning. Follow the service schedule and inspection intervals in your manual to keep your robot operating reliably and to ensure you are maintaining it properly.
Can Dirty Sensors Cause Battery Drain or Shorter Runtime?
Yes, dirty sensors can reduce battery efficiency and shorten runtime because the robot may make extra turns, bump into obstacles, and attempt docking more often. To help maintain performance, clean the sensors regularly and test the robot after cleaning.
Do Pets or Carpet Types Affect Sensor Performance Differently?
Yes, you’ll notice pets and carpets affect sensors differently. Pet hair buildup can block openings and collect around wheels, while carpet pile affects cliff readings and steering. You’re not alone. Regular checks help your robot stay reliable.
Should Firmware Updates Be Checked After Sensor-Related Errors?
Yes, like tuning your team’s compass, you should check firmware updates after sensor-related errors. This strengthens firmware troubleshooting, supports error log review, and helps rule out software glitches before assuming dirty sensors or hardware faults alone.
When Should I Replace a Scratched or Faulty Sensor?
You should replace it whenever scratch severity assessment reveals deep marks, persistent smudging, or steering still fails after cleaning and testing. For sensor replacement timing, do not wait if errors continue. Replacing it promptly helps keep your robot reliably in sync.
