
Dirty vacuum attachments can spread dust back onto your floors and furniture instead of picking it up. Start by unplugging the vacuum, emptying it, checking which tools you can wash, and then removing wrapped hair, stuck lint, and dusty buildup with care. Proper washing, drying, and storage help every attachment work better and last longer.
Gather Your Cleaning Tools
A few simple supplies can make this job faster, safer, and much less messy. Before you begin, gather your cleaning supplies in one spot so you don’t feel scattered halfway through. A soft brush helps lift dust from seams and bristles. A microfiber cloth wipes away grime without scratching plastic. Mild dish soap, warm water, and a small bucket or sink create a gentle washing setup.
Next, use a preparation checklist to stay organized.
Set out scissors or a small cutting tool for tangled hair, along with a toothpick or detail brush for tight openings. As you collect each item, separate washable parts from anything motorized. This small step helps you care for each piece with confidence. Once your tools are ready, the task feels easier and more manageable.
Turn Off and Empty the Vacuum
Before you touch any attachment, turn the vacuum off and unplug it so you can work safely and with peace of mind.
Then empty the dust container or bag to prevent loose dirt from spilling back onto the parts you’re about to clean.
This quick step gives you a cleaner setup and helps you spot debris, clogs, or wear more easily.
Power Down Safely
Once you’re ready to clean the attachments, switch the vacuum off, unplug it from the outlet, and empty the dust bin or bag so loose dirt doesn’t spill back onto the parts you just handled.
This quick reset keeps your space calmer and your cleanup more controlled, helping you start with confidence.
Next, make sure the vacuum remains fully off and stable. Put safety first by pausing before doing anything else, especially if the machine was just running and still feels warm.
Emptying the bin or replacing a full bag also improves airflow and keeps dust from blowing around your work area. Think of this step as power isolation for a cleaner, more comfortable process.
Taking a moment here helps you clean each attachment with less mess and more control.
Unplug Before Handling
Unplug Before Handling
Start by switching the vacuum off, unplugging it from the outlet, and emptying the dust bin or replacing the bag before you touch any attachment. This simple routine puts safety first and helps you avoid accidental activation while your hands are near tight connectors and moving parts. It also gives you a calm, ready-to-clean starting point, which makes the whole job feel easier.
- Check that the power switch is fully off before you reach for the hose or wand.
- Pull the plug, not the cord, so you protect the vacuum and your space.
- Steady the machine with one hand as you loosen each tool carefully.
- Pause and inspect attachments for debris, clogs, tangles, or wear before washing.
You are building a safer cleaning habit your home can rely on every time.
Empty Dust Container
Next, turn the vacuum fully off and empty the dust container or replace the bag so loose dirt doesn’t spill back into the attachments you’re about to clean.
This step keeps your workspace cleaner and helps you stay organized before washing anything. Take the bin to a trash can, open it carefully, and tap out packed dust without shaking too hard. If your vacuum uses bags, remove the full one gently and seal it before throwing it away. Then wipe the inside rim with a dry cloth to support better dust container maintenance.
A clean canister also improves empty bin hygiene, which matters when you’re handling tools up close. If you notice stuck debris, brush it loose now. By clearing the mess first, you give every attachment a fresher start and continue your clean home routine with confidence.
See Which Attachments You Can Wash
Before you wash anything, check your vacuum manual to confirm which attachments can handle water.
Separate washable plastic tools from motorized or electrical parts, since water-sensitive pieces can be damaged quickly.
Taking a moment to sort them first helps you avoid problems later and ensures each part is cleaned safely.
Check Manufacturer Guidelines
Check Manufacturer Guidelines
Although it may be tempting to place every vacuum attachment in warm, soapy water, better results usually come from checking the manufacturer’s care guide first. This simple step helps protect essential parts and keeps your cleaning routine safe, efficient, and straightforward. Before washing any component, review the manual for care labels, symbols, or specific instructions, and follow the manufacturer’s recommendations carefully.
- Check the manual for approved cleaning methods and any warnings about water exposure.
- Look for care labels on attachments, hoses, or storage caddies.
- Visit the brand’s website if the printed guide is unavailable.
- Follow any instructions related to soap use, soaking time, and drying.
Identify Washable Parts
Since not every vacuum attachment handles water the same way, take a minute to separate washable parts from motorized or specialty pieces before cleaning. That quick check protects washable materials and keeps the process simple for everyone in your home.
| Attachment type | Usually washable | Cleaning note |
|---|---|---|
| Crevice tool | Yes | Safe to soak |
| Dusting brush | Yes | Check the bristles first |
| Upholstery tool | Often | Wash only if it has no fabric |
| Extension wand | Sometimes | Inspect the finish and seams |
As you sort, look for plastic, rubber, or detachable brush pieces that can handle warm, soapy water. If a part has trapped dust, hair, or grime, place it with the washable group. This creates a routine that feels easy, practical, and manageable for anyone who takes care of their tools well.
Avoid Water-Sensitive Tools
Once you’ve sorted out the washable pieces, set the water-sensitive tools aside right away so they don’t end up in the sink by mistake. That simple step protects parts your vacuum team relies on, especially motorized heads, powered pet tools, and anything with wiring or switches. When you respect material compatibility, you avoid rust, swelling, and hidden damage.
- Check for labels, seams, batteries, or vents that indicate water-sensitive components.
- Wipe these tools with a dry microfiber cloth first, then use a barely damp cloth if needed.
- Brush out dust, hair, and grit from joints and openings instead of soaking them.
- Follow the manufacturer’s care guide, because your model’s instructions help your whole household keep cleaning smoothly.
You aren’t being picky here. You’re protecting gear that helps everyone feel at home.
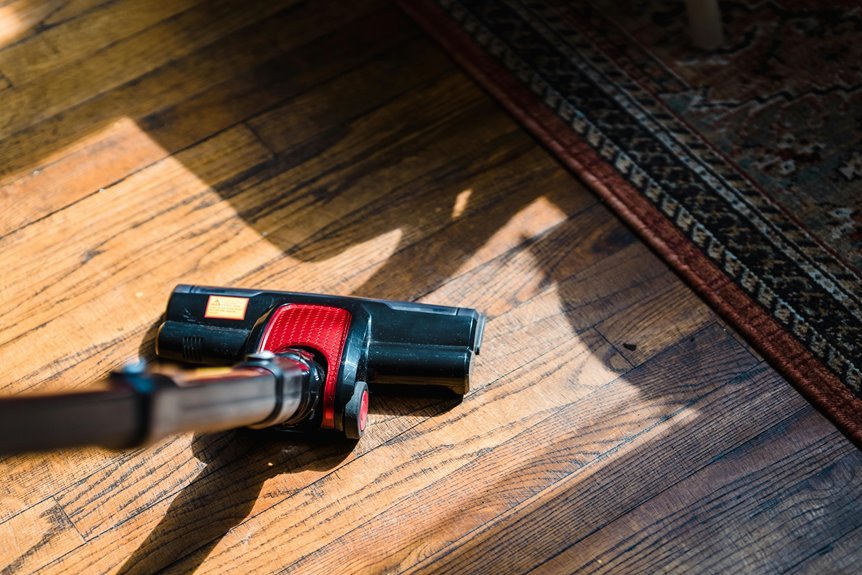
Remove Hair From Vacuum Brushes
Often, hair wraps tightly around vacuum brushes, and suction can drop quickly, but a careful, simple cleanup can solve the problem. First, unplug your vacuum and gently detach the brush. Inspect the bristles and base so you can spot hair tangles, thread, and lint before they build up.
Next, hold the brush over a bin and pull away loose strands with your fingers. For tighter wraps, slide scissors under the hair and cut along the groove without damaging the bristles. Use a soft brush to lift trapped debris from the base and around moving parts.
If your model allows it, remove the brush roll for easier access. Regular brush maintenance helps your vacuum perform well and keeps your home feeling cleaner.
Wipe Dust From Small Attachments
After you clear hair from the brushes, turn to the smaller attachments, because fine dust often hides in seams, edges, and narrow openings. Unplug the vacuum first, then detach each tool carefully.
- Shake each attachment over a bin to remove loose debris.
- Use a microfiber cloth to wipe the surfaces, especially around the connector edges.
- Use a soft brush to clean crevices your cloth can’t reach.
- Inspect narrow tips and seams, then wipe again until the cloth comes away clean.
This step keeps every tool ready for the next cleanup. It also helps you spot cracks, clogs, or worn fittings early. When you care for these small parts, your vacuum works better, and your home feels fresher.
Wash Plastic Attachments Safely
Start by rinsing off loose debris. This quick step prevents dirt from turning into a muddy mess when you wash the plastic parts.
Next, clean each washable attachment in warm water with a small amount of mild dish soap, which helps remove grime without damaging the plastic.
Before reattaching anything, let every piece air-dry completely. A little patience helps prevent odors, mold, and damage later.
Pre-Rinse Loose Debris
Before you wash any plastic vacuum attachment, shake out as much loose dust and grit as you can over a trash bin or outside. This simple step helps prevent muddy buildup when water hits the dirt.
That quick prep makes the whole job easier and helps you stay on top of your cleaning routine. For effective loose dust removal, be gentle so you don’t crack connectors or push debris deeper inside. If possible, shake the attachment outdoors, since fresh air keeps the mess out of your home and makes cleanup simpler.
- Tap the attachment lightly to loosen grit.
- Turn it upside down to release trapped particles.
- Use your fingers to remove visible lint or hair.
- Check seams and openings for hidden debris before moving on.
This kind of care helps keep your tools working well.
Use Mild Soapy Water
Now that the loose debris is out of the way, you can wash plastic attachments safely with warm water and a few drops of mild dish soap. Keep the soap solution light, because too much detergent can leave a film and make cleaning harder.
As you clean, use a soft cloth or brush to scrub grooves, bristles, and corners where grime tends to collect.
If a tool looks especially dirty, let it soak in the soapy water for 10 to 20 minutes first. Then scrub gently, paying close attention to joints and tight seams. You don’t need harsh cleaners to get good results. Mild soap helps protect plastic from damage while still lifting dirt.
When you finish washing, rinse carefully to remove detergent from every crevice and brush base. This helps prevent residue buildup that can attract fresh dust.
Air-Dry Before Reuse
Once you’ve rinsed away the soap, give each plastic attachment enough time to dry completely. Reattaching parts too soon can trap moisture, which may lead to odors, grime, or mold in hidden areas. You’ll get better results when every part of your vacuum is clean, dry, and ready to use.
- Pat each piece with a microfiber cloth to remove surface water.
- Set up a simple drying rack so air can circulate around every side.
- Leave brushes, crevice tools, and housings separated for several hours.
- Make sure all parts are fully dry before storing or reattaching them.
This step matters because water often collects in seams, around bristle bases, and inside tight connectors. If you’re unsure, allow extra drying time. That small delay helps protect your vacuum, keeps your home smelling fresher, and supports a more efficient cleaning routine.
Clean the Vacuum Hose Carefully
Because hoses trap dust deep inside their long, narrow path, clean yours with a gentle, careful approach that protects the lining and removes hidden buildup. First, unplug the vacuum and detach the hose slowly, since rushing can strain the fittings. Shake out loose debris, then inspect both ends for clogs, wear, and tangled hair.
Next, run a soft brush or microfiber cloth through the hose as far as you can reach. If the hose is washable, rinse it with warm water and a small amount of dish soap, then swish it gently rather than bending it sharply. This helps prevent cracks and supports the life of your vacuum.
Before reattaching the hose, dry the inside completely and check the connectors for loose seals, cracks, or weak connections. This helps keep your cleaning routine reliable.
Disinfect Attachments If Needed
When your attachments need more than a basic wash, disinfect them carefully so you can kill germs without damaging the plastic or finish. Before you begin, check your manual, especially when sanitizing specialty parts or coated tools. This helps protect the pieces your cleaning routine relies on.
- Mix equal parts water and white vinegar for gentle disinfecting on washable attachments.
- Dampen a microfiber cloth, don’t soak it, then wipe surfaces, seams, and grooves where grime tends to collect.
- Use a cotton swab for tight spots, and keep liquid away from motorized parts, connectors, and switches.
- For specialty tools, test a small hidden area first and follow brand guidance so your full set of home-care tools stays safe.
This isn’t overdoing it. It’s smart care for the tools that help keep your space fresh.
Let Attachments Dry Completely
After washing or disinfecting, let every attachment dry completely before putting it back on the vacuum. This step protects your machine and helps your home stay fresh. Even a small amount of trapped moisture can lead to odors, grime, or hidden buildup in tight spaces. For better moisture control, wipe each piece with a clean microfiber cloth, then place it on a towel in a well-ventilated area.
Give extra attention to surfaces such as crevices, brush bases, and plastic joints where water tends to collect. Turn attachments over once or twice so air can reach every side. If a piece has deep grooves, let it sit longer before reattaching it.
This isn’t excessive caution, it’s proper care for the tools that help keep your space clean, comfortable, and well maintained each day.
Clean Attachment Filters and Screens
While the outer parts finish drying, inspect any small filters or mesh screens built into your vacuum attachments. These parts often hold fine dust that a quick rinse doesn’t remove.
For effective filter maintenance, keep the process simple and consistent:
- Tap each filter gently over a trash bin to release packed dust.
- Use a soft brush to remove debris from mesh without pushing it deeper.
- Rinse screens carefully under warm water until the water runs clear.
- Blot with a clean cloth, then let each piece air-dry completely before reattaching.
This step helps your vacuum perform more effectively.
If a screen still looks cloudy, rinse it again and inspect the openings. Clean filters support stronger airflow and keep your attachments ready for the next use.
Avoid Damaging Attachments
Because vacuum attachments look tough, it’s easy to clean them too aggressively, but a gentle approach protects them and helps them last longer. Before you scrub, check for material compatibility so you don’t soak coated, specialty, or motorized parts. You aren’t being overly careful. You’re taking smart care of tools your home relies on.
Next, use gentle handling once you detach parts, loosen hair, and clean tight seams. Choose mild dish soap, warm water, and a soft brush instead of bleach, harsh sprays, or rough pads that can scratch plastic and weaken bristles. If you need to sanitize, confirm the maker’s instructions at the outset.
As you clean, watch connectors, seals, and hinges closely, since forcing clogs out or twisting parts can cause cracks. A calm touch keeps your attachments working like the trusted team they are.
Set a Cleaning and Storage Routine
Gentle cleaning protects your attachments, and a simple routine keeps that care from becoming a bigger chore later. When you build regular habits, your vacuum stays ready, and you stay more in control of your home.
Routine scheduling and organized storage make that easier.
- Pick one day each week to check for dust, hair, and clogs.
- Wash washable tools only after unplugging the vacuum and separating motorized parts.
- Dry every piece completely, then group attachments in a bin, drawer, or wall holder.
- Do a quick monthly inspection for cracks, worn bristles, or loose connectors.
This routine helps you stay ahead of messes without added stress. You aren’t just maintaining tools. You’re creating a sense of order, comfort, and care that makes everyday cleaning easier for everyone at home.
Frequently Asked Questions
How Often Should Vacuum Attachments Be Replaced Instead of Cleaned?
Replace vacuum attachments when you notice cracks, air leaks, bent bristles, or clogs that do not clear with cleaning. Otherwise, clean them regularly. Indoor dust can add up to 45 pounds each year, so follow a maintenance schedule and keep track of when attachments need replacement.
Can Dirty Attachments Reduce Vacuum Suction or Overall Performance?
Yes, dirty attachments can reduce your vacuum’s suction and overall performance by blocking airflow and putting extra strain on moving parts. You can improve results by detecting attachment clogs and addressing common causes of suction loss before buildup makes cleaning more difficult.
Why Do Vacuum Attachments Develop Odors After Cleaning?
Vacuum attachments develop odors after cleaning because material buildup and trapped moisture remain in bristles, joints, or crevices. To prevent smells, dry every part completely, rinse thoroughly, and store the attachments clean so your vacuum stays fresh and ready.
Which Attachment Wears Out Fastest With Regular Use?
Your brush attachment usually wears out fastest, with the bristles showing the earliest signs of fatigue. You will notice wear patterns sooner, especially when the material is less durable. If you inspect it monthly, you can keep your cleaning tools working efficiently.
How Can I Tell if an Attachment Has an Air Leak?
You can spot leaks by listening for hissing, noticing weak suction, and checking for cracks or loose fittings. Perform air leak detection during an attachment seal check to help keep your vacuum working reliably.
