
Stairs collect dust quickly, and when you clean them the right way, you can finish the job fast without risking a slip or a strained back. First, clear clutter and loose grit, then choose a lightweight vacuum with the proper tools for carpet, corners, pet hair, or wood. Next, work from the top down, one step at a time, using steady strokes and keeping the cord under control. The small mistakes that slow you down often begin before the vacuum even turns on.
Clear the Stairs Before You Start
Before you switch on the vacuum, clear the stairs so you can move safely and clean without creating a bigger mess. Start by picking up shoes, toys, papers, and anything else that could cause a trip hazard. This helps you feel more at ease, and it makes the staircase look cared for right away.
Next, remove loose debris before it spreads. Pick up larger crumbs, lint, or leaves by hand, or use a broom and dustpan for heavier buildup.
Then dust banisters, skirting, and nearby ledges so any falling dust lands on steps you’re about to clean. Check corners, edges, and stair lips for trapped fluff, because those areas tend to collect it. Once the path is clear and the dust is loosened, you’re ready to clean thoroughly and safely.
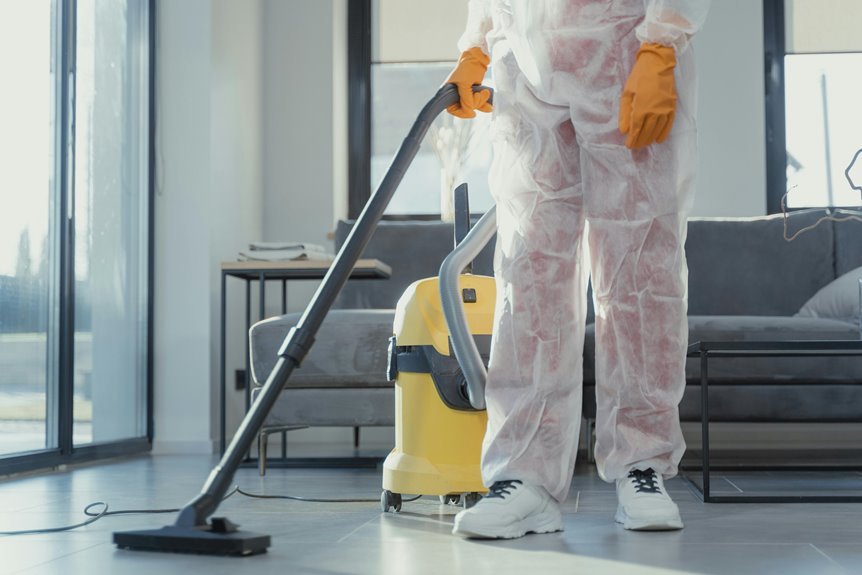
Choose a Vacuum for Stairs
After you clear the stairs, choose a vacuum that’s easy to carry and control on each step.
Compare corded and cordless models, since power, run time, and safety all affect how efficiently you can clean.
Attachments also matter, because tools such as a crevice tool or stair brush help you clean edges, corners, and carpet more effectively.
Lightweight Vacuum Options
Because stairs are tight, uneven, and easy to trip on, a lightweight vacuum gives you better control and makes the job less tiring from the first step to the last. You’ll feel steadier when reaching risers, corners, and stair edges. Compact handheld vacuums are also useful for quick pickups, especially when you don’t want to carry extra weight. Keep battery life in mind, so you don’t run out of power halfway through the job.
- A slim vacuum held close to your side
- A light handle that’s easy to guide
- Dust removed cleanly from tight stair corners
- A quick pass over each riser and tread
- A cleaner staircase that feels welcoming again
The lighter build also helps you move from step to step with confidence, keeping the task manageable, calm, and easy to maintain as part of your routine.
Corded Vs Cordless
A lightweight vacuum makes stair cleaning easier to control, and the next choice is just as personal: corded or cordless. If you want steady power for a full staircase, a corded model gives you reliable suction without charging breaks. That’s helpful when your stairs collect dust along edges and risers.
If you value freedom and quick cleanup, a cordless model can feel like the better choice. The main advantage is battery convenience, especially when you want fewer trip hazards and easier movement from step to step. Still, compare runtime before you buy. Some cordless vacuums can handle one staircase easily, while others lose power too soon.
If your home has several flights, a corded model may suit you better. If you clean often and prefer grab and go convenience, cordless can help you stay consistent every week.
Helpful Stair Attachments
Smart attachments can turn a tiring stair job into a much easier one, and they often matter just as much as the vacuum itself. When you choose a stair friendly vacuum, look for tools that help you clean every step with confidence and fit naturally into your routine.
- A crevice tool reaches tight corners and stair edges.
- An upholstery brush lifts lint and pet hair from carpeted treads.
- A motorized stair tool pulls grit from deeper carpet fibers.
- Wider specialty nozzles cover each tread faster after detailed work.
- Easy attachment storage keeps your tools nearby and ready to use.
Just as cordless convenience helps you move safely, the right tools help you clean more effectively. If your vacuum also offers suction control, you can guide it more smoothly and avoid fighting the carpet on every step.
Grab the Right Stair Attachments
For stair cleaning, the right attachment can make the job much easier. You’ll feel more in control when your vacuum fits the task instead of working against you.
A crevice tool reaches tight corners, stair edges, and the area where the tread meets the riser. For carpeted steps, choose an upholstery brush, brush head, or motorized stair tool to lift dirt from the fibers.
It is also important to consider attachment material and grip comfort. A lighter tool feels easier to handle, and a comfortable grip helps you stay steady on each step.
If your vacuum allows it, lower the suction for better control on carpet. Then switch to a wider brush head after detail work so you can clean more smoothly and keep the process under control.
Start at the Top to Vacuum Stairs
Once you’ve got the right attachment in hand, your cleaning path matters just as much. Start at the top so gravity works with you, not against you. This top down cleaning sequence keeps loosened dust from landing on steps you’ve already cleaned. It also gives you better downward debris control, which helps the whole staircase feel truly finished.
Picture yourself moving with purpose and confidence:
- dust drifting gently to the step below
- a clear view of each tread from above
- crumbs collecting where you expect them
- your path opening as the staircase clears
- a neater stairway that feels welcoming
Vacuum Stairs One Step at a Time
As you move down the staircase, clean each step completely before shifting your feet to the next one. A step by step approach helps you stay organized, keeps dirt from slipping past you, and makes the job feel more manageable. You don’t need to rush. Instead, maintain a steady rhythm that helps you focus and stay in control.
On each step, vacuum the tread first, then the riser, using slow, overlapping strokes. If the surface is carpeted, use short, firm passes to lift debris from the fibers. If it’s smooth, keep your strokes even and gentle.
This method helps you catch what others miss and gives you the satisfaction of knowing every step is part of the same clean, well cared for home. You’re creating order, one calm pass at a time.
Clean Stair Edges and Corners
While you clean each step, give extra care to the edges and corners, because that’s where dust, lint, and pet hair tend to collect. When you slow down and inspect those narrow lines, your stairs begin to look thoroughly cared for. Focus on lint in the corners and steady dust removal along the edges, especially near stair lips and where the tread meets the riser.
- Dust tucked along the wall like gray thread
- Soft pet hair gathered in small, shadowed bends
- Crumbs resting against the stair lip
- Fine lint packed into carpet seams
- Clean edges that make the whole staircase feel welcoming
As you move from one step to the next, trace these areas with short, careful passes. You’ll leave each stair looking finished, polished, and ready for everyone in your home.
Use Attachments for Tight Spots
Because stair dirt loves to hide in narrow seams, the right attachment helps you clean those tight spots without turning the job into a struggle. Start with a crevice tool on corners, stair lips, and where the tread meets the riser. You’ll reach dust your main head misses, and that small win makes the whole staircase feel more manageable.
Next, switch to an upholstery or small brush tool for carpeted steps, especially when fibers hold lint or pet hair.
These crevice attachment tips help you stay precise without wasting effort. Use short passes, overlap slightly, and change angles to pull debris from tucked-in areas. If your vacuum feels hard to control, lower the suction or use a lightweight handheld setup. You’ve got this, and your stairs will show it.
Protect Carpet While Vacuuming Stairs
As you move from tight spots to the full stair surface, protect your carpet by using a gentle brush setting that cleans without pulling at the fibers.
Guide the vacuum carefully along stair edges, because rough passes can wear them down and lead to fraying over time.
A lighter touch helps keep your stairs looking neat and lets you clean with confidence, without worrying about damage.
Gentle Brush Settings
If your stair carpet looks delicate or feels hard to push over, switch to a gentler brush setting before you start. This simple adjustment helps you guide the vacuum with less brush pressure, so the tool glides instead of grabbing. The bristles should touch the carpet lightly, not dig into it. This helps protect the surface and makes cleaning feel easier and more controlled.
- Picture the brush moving lightly over each tread
- Notice the vacuum moving with less tug and strain
- See the carpet fibers remain soft and settled
- Watch dust lift away without rough scrubbing
- Maintain a calm, steady rhythm on every step
As you work, test one stair first. If it feels smooth and controlled, you have found the setting that works best for your carpet.
Prevent Edge Fraying
While the vacuum glides over each step, protect the carpet edge by keeping the tool flat and moving it with short, controlled strokes instead of dragging it firmly across the stair lip. That small change helps prevent carpet fraying and keeps your stairs looking cared for, not stressed. When suction feels too strong, lower it so the fibers do not tug.
| Do | Why |
|---|---|
| Keep strokes short | Reduces pull on edges |
| Use stair edge guards | Shields vulnerable carpet trim |
Next, angle the crevice tool into corners instead of scraping along the lip. You will lift lint without roughing up the binding. When your staircase gets heavy foot traffic, check the edges weekly and fix loose threads promptly. That way, your home stays welcoming, and you can feel proud knowing your stairs are protected like the rest of your space.
Protect Wood and Hard-Surface Stairs
Because wood and other hard-surface stairs scratch more easily than carpet, vacuum them with a gentler touch from the start. For solid wood stair care, use a soft brush attachment, slow strokes, and lower suction if your vacuum allows it. This simple adjustment improves hard-surface protection and helps each step stay beautiful for everyone in your home.
- A soft brush moving lightly over each tread
- Fine dust lifting from corners without scraping the surface
- Sunlight reflecting off a smooth riser without dull marks
- A steady hand on the rail as the vacuum works below
- Clean edges that look polished, neat, and well cared for
Before each pass, check for grit under the nozzle. Then vacuum the tread, riser, and edges carefully.
Remove Pet Hair From Stairs
Even with regular vacuuming, pet hair can cling to stair carpet and gather along edges, corners, and stair lips where standard passes often miss it. For better pet hair removal, start by loosening hair with a rubber glove, carpet brush, or damp microfiber cloth. This extra step helps lift stubborn fur buildup and makes routine cleaning more effective.
Next, use your vacuum’s upholstery brush or motorized stair tool with short, firm strokes. Clean each step from more than one angle so trapped strands release from the fibers.
Then run the crevice tool along the sides and where the tread meets the riser. If your pet sheds heavily, give those areas a second pass. A few focused steps can make your stairs feel fresh again.
Avoid Common Stair Vacuuming Mistakes
You can make stair vacuuming much safer and easier when you place the vacuum securely, keep the cord out of your path, and choose the right attachment for each part of the stair.
If you let the vacuum tip, drag the cord near your feet, or use the wrong tool, you waste effort and increase the risk of slips or missed dirt.
Next, you’ll see how a few smart adjustments can help you clean with more control and far less frustration.
Secure Vacuum Placement
For better control on the stairs, place the vacuum below the step you’re cleaning and make sure it sits flat and steady before you begin. This habit improves vacuum stability and helps you feel secure with every pass. Proper vacuum placement keeps the machine from shifting while you work, so you can stay focused and balanced.
As you move, pause and reset the vacuum on a solid tread whenever needed.
- Position the vacuum so it rests squarely on one step and doesn’t tilt.
- Keep the base close enough for the hose to reach without pulling.
- Set the wheels straight so the unit doesn’t drift sideways.
- Leave open space around the vacuum so your feet and stance stay clear.
- Check that the handle feels steady in your grip and doesn’t tug.
With that setup, you can clean with confidence on the stairs.
Avoid Cord Hazards
A steady vacuum setup helps, and cord control protects that stability. As you move on the stairs, keep the cord behind you and away from your feet. Good cord management gives you more control and helps your whole cleaning routine feel calmer and safer.
To make trip prevention part of every pass, drape the cord over your shoulder or guide it along the wall side of the staircase. Check where it falls before you change steps, especially when you turn or reach.
If possible, plug into an outlet near the stairs so the cord doesn’t stretch tightly across your path. A loose cord can pull the vacuum, catch your shoe, or interrupt your rhythm. When you stay aware of the cord, you protect your balance and clean with more confidence and ease.
Use Proper Attachments
Choose the right attachment first, and stair vacuuming gets easier quickly. Smart attachment selection helps you stay in control instead of feeling frustrated, which matters when you’re balancing on steps. Check nozzle compatibility before you begin, so each tool fits securely and works with your vacuum’s suction.
- A slim crevice tool reaches dusty corners effectively.
- A soft upholstery brush lifts pet hair from carpeted treads without rough scraping.
- A motorized stair tool cleans deep into thick fibers where grit collects.
- A wider brush head covers each tread smoothly and efficiently.
- A lightweight handheld setup helps you move step by step with less strain.
Then adjust suction if needed. Lower power can reduce tugging, helping you clean safely and neatly.
Vacuum Stairs Faster and Safer
Often, the fastest way to vacuum stairs is also the safest. Clear toys, shoes, and loose clutter first. Dust the banister and nearby trim so fallen dirt lands on steps you will clean next. Remove larger debris with a broom, dustpan, or microfiber cleaner before you start vacuuming.
Next, begin at the top and work downward with a steady rhythm. Keep one hand near the rail, the vacuum below you, and the cord over your shoulder. These vacuuming efficiency tips can help you stay in control.
| Step | Action | Safety |
|---|---|---|
| Top | Clean corners first | Keep footing firm |
| Middle | Use short, overlapping strokes | Keep the rail within reach |
| Bottom | Recheck edges | Stop before twisting |
Finish each step completely before moving to the next one. Your stairs will look cleaner, and your home will feel more welcoming.
Frequently Asked Questions
How Often Should Stairs Be Vacuumed in a Typical Household?
Vacuum stairs weekly in a typical household. Increase the frequency if your stairs get heavy foot traffic, if you have pets, or if children regularly track in dirt and debris. This helps keep your home cleaner, more welcoming, and easier to maintain.
Should Stair Railings Be Wiped Down After Vacuuming?
Yes, you should wipe stair railings after vacuuming. It improves railing hygiene and completes handrail maintenance. This step removes lingering dust, oils, and allergens, helping your home feel cleaner, safer, and more welcoming for everyone.
Can Humidity Affect Dust Buildup on Carpeted Stairs?
Absolutely, humidity can affect how dust builds up on carpeted stairs. Higher moisture in the carpet can trap more particles, while very dry air allows dust to float and settle more easily. You’re not alone, balanced humidity can help keep buildup manageable.
What Should I Do if Vacuuming Leaves a Musty Smell?
If vacuuming leaves a musty smell, check for damp carpet, clogged filters, and dirty brushes. To troubleshoot odors, empty the bin, clean the attachments, and follow proper vacuum maintenance steps so your stairs smell fresh again.
When Should Stairs Be Professionally Deep Cleaned Instead?
Since about 80% of household dust settles in carpets, schedule professional cleaning whenever your stairs show stubborn stains, trapped odors, flattened fibers, or allergy flare-ups. This helps keep your home fresh and welcoming.
