
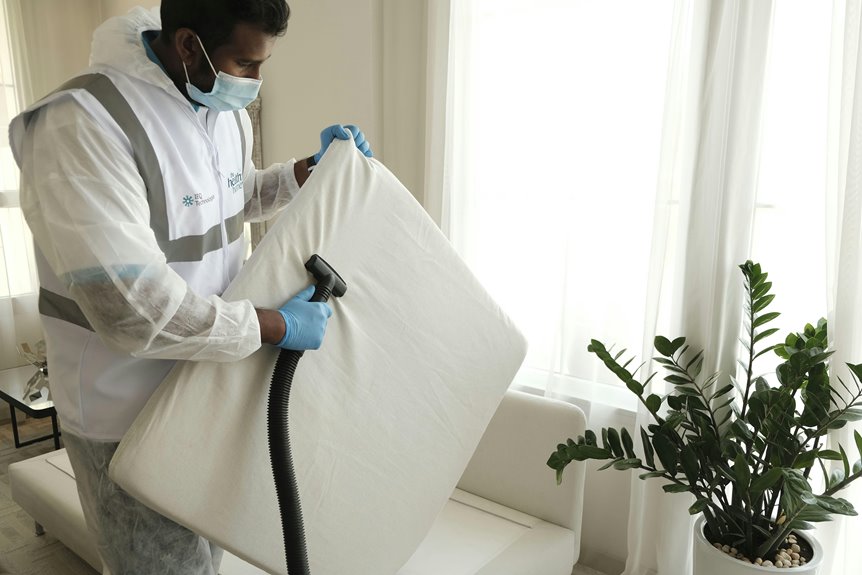

Most people do not realize that a mattress can hold dust deep in its seams and padding long after the surface looks clean. If you want to remove it with a vacuum, start by checking the care label, stripping the bed, and using the correct attachment with gentle suction so you can lift dust without damaging the fabric. After that, a few simple steps can make your bed feel fresher, cleaner, and far more comfortable than you might expect.
How to Vacuum Dust From a Mattress
How do you get dust out of a mattress without making the job harder than it needs to be? Start by removing all bedding, toppers, and covers so you can reach every surface. Then pull the mattress slightly away from the wall and make sure it’s dry.
Next, use the upholstery tool on the main fabric and the crevice tool on seams, corners, and piping. Choose a gentle vacuum setting for delicate materials, and move in slow, overlapping passes from top to bottom. This steady method helps you clean efficiently and thoroughly.
Pay extra attention to body areas, edges, and the sides, where dust tends to collect. If your vacuum has a HEPA filter, that’s even better. Also, don’t skip filter maintenance, because strong airflow helps create a cleaner, more comfortable bed.
Why You Should Vacuum Your Mattress
Vacuuming your mattress does more than make the bed look neat. It helps create a cleaner, more welcoming place to rest, so your bed feels like a space where you can truly relax. As dust, skin flakes, and debris build up, they can settle deep into the fabric and affect your comfort night after night.
That’s why regular vacuuming supports both allergen reduction and better sleep hygiene. It removes particles that can trigger sneezing, itchy eyes, and stuffy mornings, especially if you’re sensitive to dust.
It also freshens the surface where you spend hours each day, which makes your whole bedroom feel more cared for. In turn, your bed becomes a healthier part of your routine, and that small habit can help you feel more at ease and ready for real rest.
Check the Mattress Care Label First
Before you vacuum, check your mattress care label to avoid damaging the fabric or inner materials.
It explains which cleaning methods are safe and whether vacuuming is suitable for your mattress type.
This quick step helps you select the right attachment and suction setting with confidence.
Read Cleaning Instructions
Although it’s tempting to grab the vacuum right away, check the mattress care label first so you do not damage the fabric or inner layers by using the wrong setting or cleaning method. Taking a moment to review the label helps you clean more safely and effectively. Read the care label closely, then follow any vacuum instructions, fabric warnings, and drying notes before you begin.
| What to read | Why it matters |
|---|---|
| Care label terms | They tell you what the mattress can handle |
| Surface material | Different covers need different care |
| Cleaning warnings | They help you avoid tears or trapped moisture |
| Manufacturer notes | They guide safe, confident cleaning |
As you move from preparation to cleaning, these directions help you stay on track. If a label says dry only, keep moisture away. If it limits pressure, use a gentle touch and stay consistent throughout.
Verify Vacuum Compatibility
Because mattresses use different cover fabrics and inner materials, confirm that your vacuum and attachment are safe for the surface before you begin. Check the care label for fabric limits, suction warnings, and whether the mattress can handle an upholstery tool or only light cleaning.
Next, make sure your vacuum hose fits the attachment you plan to use securely. A loose connection can drag, skip, or press too hard on delicate fabric.
If your mattress has memory foam, pillow top padding, or a knit cover, use lower suction. Also confirm that the filter system is effective, since a strong filter setup helps trap fine dust instead of sending it back into the room. When your tools suit your mattress, the job is easier and more reliable.
Choose the Best Vacuum for Mattresses
When you’re choosing a vacuum for your mattress, the best option is one that cleans deeply without being too harsh on the fabric. You want a model that helps your bed feel fresh, safe, and well cared for, just like the rest of your home. To make that easier, focus on features that support effective, gentle cleaning:
- HEPA filtration helps trap fine dust and allergens instead of releasing them back into your room.
- Suction control lets you adjust the power, which is important if your mattress has delicate fabric or foam layers.
- A sealed system keeps captured particles contained, so your cleanup feels more complete.
- A lightweight, easy-to-carry vacuum makes regular mattress care feel simple, not like a weekend workout.
This helps you maintain a cleaner, more comfortable sleep environment each night.
Pick the Right Mattress Vacuum Attachments
For the best results, match each attachment to the part of the mattress you’re cleaning. On the broad surface, use an upholstery nozzle because it sits flat, maintains steady contact, and removes dust more evenly. If your mattress has delicate foam or a plush top, lower the suction so you can clean gently without pulling at the fabric.
Next, switch to the crevice tool for seams, piping, tufts, and edges. These tight areas collect the grit most people miss, so this step helps you clean more thoroughly. Apply steady pressure, but keep the tool moving smoothly.
If your vacuum has HEPA filtration, use it. It will capture finer particles instead of releasing them back into the room. With the right setup, your mattress gets a deeper clean, and your space feels fresher, calmer, and better maintained every day.
Strip the Bed Before You Start
Before you vacuum, remove every layer so you can reach the entire mattress surface.
Wash your sheets, pillowcases, blankets, and mattress protector first, and use hot water whenever the care label allows it to help reduce dust and allergens.
If you use a topper or pad, remove that as well and clean it separately so dust doesn’t remain trapped underneath.
Remove Bedding Layers
Start by stripping the bed completely so your vacuum can reach the entire mattress, not just the areas around the sheets. This step clarifies the basics of bedding removal and prepares the mattress for cleaning. Remove every layer so nothing covers dust underneath.
- Remove sheets and pillowcases first, then set the pillows aside.
- Take off blankets, quilts, and comforters to clear the surface.
- Remove the mattress protector, pad, or topper for full access.
- Pull back bed skirts or dust ruffles to expose the edges and sides.
This order keeps the process simple and organized. It creates a clean starting point and gets the mattress ready for the next step.
Wash Linens First
Once the bed is bare, wash the sheets, pillowcases, blankets, and mattress protector right away so dust, skin flakes, and allergens don’t end up back on the mattress you’re about to clean.
This quick step helps you start fresh and keeps your cleaning effort from going in circles.
If the care labels allow it, use hot water to help loosen grime and reduce allergens, especially if anyone in your home wakes up stuffy or itchy.
Dry everything completely before putting the items back on the bed, because trapped moisture can create additional problems.
If you use a topper or pad, wash that as well, or clean it separately before vacuuming underneath.
You’re creating a cleaner sleep space for yourself and everyone who shares your home, and that makes a difference every night.
Vacuum the Mattress Surface Slowly
Vacuum the mattress surface slowly.
In most cases, moving the vacuum slowly across the mattress helps remove more dust from the fabric instead of skimming over the surface. A steady pace improves contact with the material and makes the cleaning more effective. Use slow passes and keep the attachment close to the fabric.
- Start at the head of the mattress and work toward the foot in neat rows.
- Use overlapping strokes so you don’t leave dusty strips behind.
- Pause briefly over areas where skin flakes and dust tend to collect more quickly.
- Keep each pass steady and controlled instead of rushing.
As you move from section to section, the process becomes more consistent and easier to manage. You aren’t just vacuuming efficiently. You’re vacuuming thoroughly, and giving your bed the care it needs.
Clean Mattress Seams and Edges
After you’ve covered the flat surface with slow, even passes, shift your attention to the seams and edges, because that’s where dust, lint, and allergens tend to collect. Switch to your crevice tool, then trace every stitched line, corner, and piped edge with steady pressure. This step matters because hidden dust pockets build up where fabric folds meet.
For more thorough seam cleaning, work from one end of the mattress to the other so you don’t miss any sections. Pause at tufts, labels, and tight corners, and use short, overlapping passes to lift trapped debris. If the mattress fabric feels delicate, lower the suction slightly so you protect the surface while still removing buildup. Taking extra time here helps the bed feel genuinely fresh, and that added effort keeps your sleep space clean, comfortable, and well cared for.
Vacuum Under the Mattress Too
Before you set the mattress back down, clear dust and debris from the floor so it doesn’t end up back in your bed.
Then vacuum the bed frame area carefully, since dust often settles along rails, slats, and corners.
This extra step helps keep the entire sleep space cleaner, not just the mattress surface.
Clear Floor Debris
Start by vacuuming the floor under and around the bed. Loose dust, hair, and lint can drift back onto the mattress while you clean. This step improves room preparation and makes floor clearing more effective, so the effort feels worthwhile.
- Move nearby bins, slippers, and storage boxes so you can reach the entire area.
- Vacuum slowly along baseboards and across open floor space where dust tends to collect.
- Run the vacuum under the mattress edges to remove lint clumps and pet hair before they spread.
- Check corners for grit or crumbs, then make one final pass around the bed.
Clearing the floor first creates a cleaner area for the rest of the task. It’s a small step, but it helps the whole space feel fresher, more orderly, and more comfortable.
Vacuum Bed Frame Area
With the floor clear, turn your attention to the bed frame area and the space under the mattress, because dust collects where it’s hard to see. Use your crevice tool along rails, joints, slats, and corners, where dust builds up quickly. If your mattress lifts easily, raise it and vacuum the support surface underneath, including the box spring edges.
Next, slide the vacuum hose under the bed and work slowly from one side to the other. Cleaning under the bed helps prevent loose dust, hair, and crumbs from drifting back onto the mattress you just cleaned. If you spot cobwebs or lint clumps, vacuum them before they spread.
This step creates a cleaner, calmer sleep space. It helps your whole bed feel fresh, welcoming, and ready for you each night.
Flip or Rotate the Mattress
Once you have finished vacuuming the top and sides, rotate the mattress so you can clean every edge evenly and reach dust that collects near the bed frame. This step helps keep the bed clean and also supports even wear. If your mattress is designed to be flipped, follow the manufacturer’s recommended flipping schedule so both surfaces stay cleaner.
- Slide the mattress slowly, and ask for help if it feels heavy.
- Rotate it 180 degrees to expose areas that were positioned near the headboard.
- Flip it only if the manufacturer confirms that it’s double-sided.
- Vacuum the newly exposed side, seams, and corners immediately.
Use Baking Soda Before Vacuuming
After you’ve rotated or flipped the mattress, baking soda can help freshen the surface before one final vacuum pass. Sprinkle a thin, even layer across the fabric, especially where your body rests most often. This simple step helps absorb odors, so your bed feels cleaner and more welcoming.
Next, give the baking soda time to work. Let it sit for at least 30 minutes, or longer if the mattress smells stale. While you wait, you’re giving your sleep space the same care many tidy-home people value.
Then vacuum slowly and thoroughly over the entire surface, including the seams and edges. Focus on removing all residue, because leftover powder can cling to the fabric. Once you finish, your mattress will feel refreshed, and your whole bed setup will feel more inviting and comfortable again.
Spot-Clean Stains the Right Way
While you notice spots or stains while vacuuming, treat them carefully so you don’t push dirt deeper into the mattress. Since you have already loosened surface dust, this is the right time to clean marks with a light touch and a little patience.
- Do a stain pretest on a concealed spot first.
- Use a small amount of mild cleaner on a cloth, not directly on the mattress.
- Practice gentle blotting instead of scrubbing, so fibers stay intact.
- Follow with a clean, barely damp cloth to lift residue.
This step helps your mattress feel fresh without soaking it. You aren’t aiming to flood the fabric. You’re caring for it the way experienced people do. Keep moisture low, work from the outside of the stain inward, and let the area dry fully before remaking your bed.
How Often to Vacuum a Mattress
Ideally, you should vacuum your mattress about once a month to keep dust, skin flakes, and allergens from building up faster than you realize.
That monthly habit gives you a simple vacuum schedule you can actually stick with, and it helps your bed feel fresher, cleaner, and more welcoming night after night.
If you have allergies, pets, or open windows often, vacuum every two weeks instead. In busy homes, dust settles fast, so a shorter routine can make a real difference.
It also helps to tie mattress care to a seasonal schedule, such as the first weekend of spring, summer, fall, and winter. That way, you won’t forget when life gets busy.
After illness, home projects, or heavy shedding seasons, give your mattress an extra pass.
Your bed supports you every day, so this care helps keep it part of a healthy home.
Mattress Vacuuming Mistakes to Avoid
You can make mattress vacuuming less effective if you use dirty attachments, rush through the surface, or skip the seams.
When you move too fast, your vacuum can’t lift as much dust, and when attachments are dusty, you put debris back onto the fabric.
Timing matters, and careful attention to detail matters too, because the seams often hold the most dust and allergens.
Using Dirty Attachments
Before you start on the mattress, take a quick look at your vacuum attachments. A dusty upholstery tool or crevice nozzle can put grime right back onto the fabric you’re trying to clean.
That small step helps your bed feel truly cared for. Clean attachment hygiene and regular sanitation protect the surface you’re working hard to refresh. To keep your routine safe and welcoming, follow these steps:
- Wipe each attachment with a damp cloth before use.
- Remove wrapped hair, lint, and trapped dust from brushes.
- Check the crevice tool for hidden buildup inside the tip.
- Let attachments dry fully before they touch the mattress.
When your tools are clean, you aren’t spreading old debris around your sleeping space. You deserve a mattress that feels fresh, comfortable, and ready for real rest.
Vacuuming Too Quickly
Even though it’s tempting to finish quickly, rushing the vacuum across your mattress leaves behind dust, skin flakes, and allergens buried in the fabric. When you move too fast, the suction doesn’t have enough time to lift particles from the surface. As a result, your mattress may look cleaner, but it won’t feel truly fresh.
Instead, vacuum in slow, steady lines and overlap each pass. That simple change helps you clean more effectively and get better results. Skipping slow passes often means missing the areas where your body rests most, which allows buildup to remain.
Give the vacuum a few extra seconds to do its job. You aren’t being fussy. You’re taking care of the place where you rest and recharge each night.
Ignoring Mattress Seams
Along the seams, your mattress collects some of the heaviest dust buildup. If you skip these narrow edges, you leave behind debris, skin flakes, and allergens that settle where your vacuum may not reach effectively on its own. That means your mattress can appear clean while hidden dust still remains.
To clean thoroughly, follow these seam inspection tips:
- Run a crevice tool slowly along every seam and piped edge.
- Lift folds and fabric lips so you don’t miss trapped dust.
- Vacuum corners, tufts, and side panels where buildup tends to spread.
- Make a second pass over high-use areas near your shoulders and hips.
When you give seams extra attention, you aren’t overdoing it. You’re cleaning the way experienced home caretakers do, and your bed will feel fresher.
Frequently Asked Questions
Can Vacuuming a Mattress Help Reduce Allergy Symptoms at Night?
Yes, vacuuming your mattress can help reduce allergy symptoms at night by removing dust mites, dust, and other allergens. Cleaning seams, bedding, and nearby surfaces regularly can make your sleep space healthier and more comfortable, which may help you breathe easier.
Should I Vacuum the Box Spring and Bed Frame Too?
Yes, you should vacuum them too. Box spring care and bed frame dusting help prevent dust from settling back onto your mattress. This creates a cleaner, more comfortable sleep space and supports a healthier nightly routine for everyone.
Is a Mattress Encasement Worth Using After Vacuuming?
Yes, mattress encasements are worth using. They can block millions of dust mite allergens from settling into your bed. You get stronger mattress protection, better dust prevention, and a cleaner, fresher sleep space you can feel good sharing.
Can I Vacuum a Memory Foam Mattress Without Damaging It?
Yes, you can vacuum a memory foam mattress safely if you follow proper vacuuming practices. Use low suction, an upholstery attachment, and slow, gentle strokes. This helps keep your mattress fresh while protecting the foam from damage.
What Should I Do if My Mattress Still Smells Dusty Afterward?
If your mattress still smells dusty, continue airing out the mattress, sprinkle baking soda over the surface to help neutralize odors, wait several hours, then vacuum again. You should also wash your bedding in hot water and clean the bed frame so the entire bed feels fresh.
